6 Best High Cri Lights For Accurate Yarn Dyeing
Achieve perfect color matching with our top 6 high-CRI lights. Discover how superior color rendering ensures accurate yarn dyeing for professional results.
Achieving the perfect colorway in your yarn dyeing process requires more than just high-quality pigments and premium wool bases. Without the right light source, the subtle undertones of your hand-dyed variegated yarn can look completely different once it hits the daylight. Investing in high-CRI lighting is the secret to ensuring your color palettes stay true from the dye pot to the finished garment. This guide breaks down the best lighting solutions to help you achieve professional-grade color accuracy in your home studio.
Yuji Lighting 95+ CRI LED Strip: Best Overall
When you need consistent, full-spectrum light across an entire dye station, these strips are the gold standard. They provide an incredibly high CRI (Color Rendering Index) that mimics natural sunlight, which is essential when you’re trying to match a specific shade of indigo or madder root.
For those of us who dye in batches, having even illumination is critical. These strips eliminate the "hot spots" that standard overhead bulbs create, ensuring you don’t misjudge the saturation of your yarn while it’s still wet.
The downside is the installation, which requires a bit of technical setup compared to a simple screw-in bulb. However, for serious dyers, the trade-off is worth it to avoid the heartache of a "daylight surprise" when your finished skeins finally hit the natural light.
Waveform Lighting FilmGrade LED: Best for Accuracy

If your work demands absolute color precision—like recreating a specific vintage colorway for a stranded colorwork project—this is your best choice. These LEDs are designed for film production, meaning they prioritize color consistency above all else.
They offer an R9 value that is significantly higher than standard "bright" bulbs. This is the secret sauce for fiber artists, as the R9 value specifically measures how well a light source renders deep reds and subtle pinks, which are notoriously difficult to capture in hand-dyed wool.
While these are a premium investment, they prevent the frustration of "metamerism," where colors appear to match under one light but clash under another. If you sell your yarn, this level of accuracy is non-negotiable.
Soraa Vivid LED PAR30: Best for Color Rendering
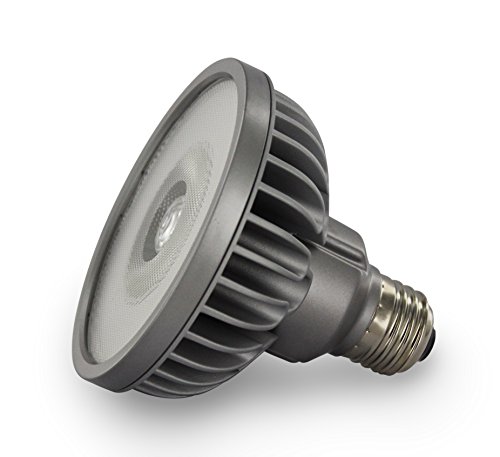
Soraa bulbs use a unique LED technology that produces a single-source light point, mimicking the crispness of a halogen bulb. This is fantastic for seeing the true texture and twist of your yarn, not just the color.
When you are inspecting a freshly dyed batch for evenness, you need to see how the light hits the twist of the ply. These bulbs provide that high-contrast clarity that helps you spot uneven absorption or "breaks" in your color application.
They do run slightly warmer to the touch than typical LEDs, so ensure your fixtures are properly ventilated. For the dedicated dyer, the clarity provided by these bulbs is unmatched for quality control.
Hyperikon CRI 90+ LED Bulb: Best Budget Option

Not every dyer has the budget for professional studio lighting, and that is perfectly okay. The Hyperikon bulbs are a fantastic entry point for those just starting to experiment with professional-grade color assessment without breaking the bank.
They offer a solid CRI of 90+, which is a massive upgrade over the standard, low-CRI "daylight" bulbs found at the hardware store. You will immediately notice that your blues and greens look deeper and more accurate.
Keep in mind that while these are excellent for the price, they may have a slightly shorter lifespan than the high-end professional options. They are the perfect "stepping stone" for a hobbyist who is ready to move beyond basic lighting.
Cree Lighting 90+ CRI A19: Best for Studio Use

Cree bulbs are a workhorse in the fiber arts community because they are widely available and consistently reliable. They provide a balanced spectrum that makes it easy to distinguish between similar tones, like navy and charcoal.
If you are setting up a dedicated space for photography and social media, these bulbs provide a clean, neutral base. They don’t introduce a yellow or blue cast, which is vital when you are trying to capture the true essence of your yarn for an online shop.
They are incredibly easy to integrate into existing lamps or overhead fixtures. If you want a "set it and forget it" solution that improves your workspace immediately, this is your go-to.
Philips Hue White Ambiance: Best Smart Lighting

The true power of the Hue system for a dyer is the ability to adjust the color temperature on the fly. Sometimes you want to see how your yarn looks in the warm glow of a living room lamp versus the cool light of a morning sun.
By adjusting the Kelvin scale through an app, you can simulate different environments to see how your colorway will hold up in various settings. This is a game-changer for knitters who design their own patterns and want to ensure the colors pop in all lighting conditions.
The initial setup is more complex, and you are paying for the smart functionality. However, the ability to "test" your yarn under different light temperatures without changing bulbs is a major convenience.
Why High CRI Matters for Accurate Yarn Dyeing
Color Rendering Index (CRI) is a measurement of how accurately a light source reveals the true colors of an object compared to natural sunlight. For a dyer, a low-CRI bulb is like trying to paint a masterpiece while wearing tinted sunglasses.
Low-CRI lights often fail to render the full spectrum, leading to "muddy" colors that look vibrant in the pot but dull once the yarn is dry and in your hands. This is especially true for complex colors like purples, teals, and deep reds.
By choosing high-CRI lighting, you ensure that the pigments you carefully measured are exactly what you see. It eliminates the guesswork and helps you build a reputation for consistent, reliable colorways.
Understanding Color Temperature and Kelvin Scales
Color temperature, measured in Kelvin (K), dictates whether your light looks "warm" (yellow/orange) or "cool" (blue/white). For dyeing, you generally want to aim for the 5000K to 5600K range, which closely mimics high-noon daylight.
Avoid "soft white" bulbs (2700K-3000K) as they will cast a yellow hue over your work, making it impossible to see the true undertones of your dyes. Conversely, avoid extremely high Kelvin ratings (above 6500K), as they can introduce an artificial blue cast.
Finding that "sweet spot" in the 5000K range provides a neutral canvas. It allows you to see the yarn exactly as it is, without the lighting environment influencing your perception of the color.
Setting Up Your Dye Studio for Consistent Results
Consistency starts with controlling your environment as much as possible. I always recommend setting up your dye station away from windows if you want to rely on artificial light, as natural light changes too drastically throughout the day.
Use a combination of overhead lighting and task lighting to eliminate shadows. If you are dyeing in a basement or a room with limited natural light, layer your high-CRI bulbs to ensure the light hits your workspace from multiple angles.
Keep your surfaces neutral—white or light gray—to avoid color reflection. A bright red table, for instance, will bounce red light onto your yarn, tricking your eyes into thinking your dye is more saturated than it actually is.
How to Test Your Light Source for Color Accuracy
The easiest way to test your lighting is the "Daylight Comparison" method. Take a skein of yarn you have dyed and view it under your new studio lights, then take it outside into direct, natural midday sun.
If the colors look significantly different, your light source is likely lacking in certain parts of the spectrum. You can also use a "color checker" card, which provides a series of standardized color swatches to help you identify which hues your light is failing to render correctly.
Remember, your eyes are your most important tool, but they are also easily fooled by context. Trust your equipment, calibrate your space, and always double-check your work in natural light before finalizing a batch.
Mastering your lighting environment is one of the most rewarding steps you can take to elevate your dyeing craft. By prioritizing high-CRI bulbs and understanding the nuances of color temperature, you gain total control over your creative process. Start small, test your results, and you will soon see your yarn colors with a clarity you never thought possible. Happy dyeing, and may your colors always stay true to your vision.