6 Best Seam Rippers For Correcting Assembly Mistakes
Mistakes happen, but the right tool makes fixing them easy. Discover our top 6 seam ripper picks to help you undo assembly errors quickly and safely today.
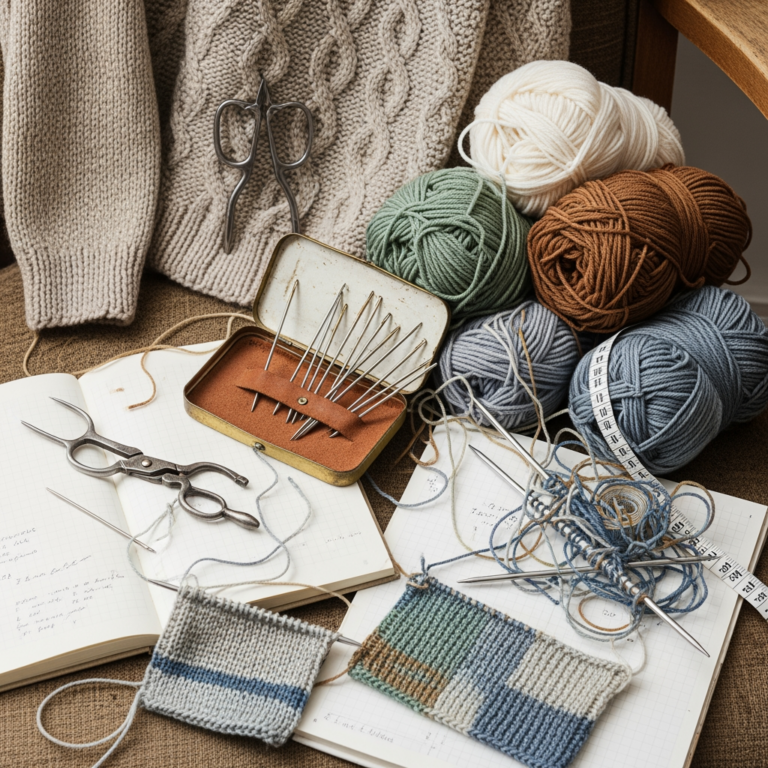
Every knitter, from the novice learning the knit stitch to the expert tackling complex brioche, will eventually face the dreaded mistake. Whether it is a dropped stitch hidden in a cable or a misaligned seam in a sweater assembly, the right tool makes the difference between a quick fix and a ruined garment. A high-quality seam ripper is not just a sewing accessory; it is an essential insurance policy for your hand-knit projects. Here is how to choose the right tool to rescue your hard work without damaging your precious fibers.
Clover Seam Ripper: Best Overall for Knitters
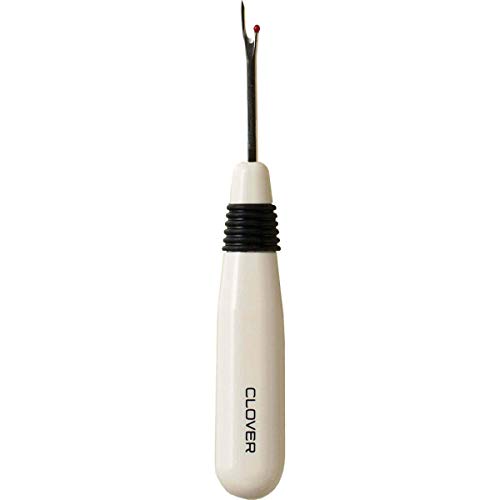
The Clover Seam Ripper is a staple in my notions bag because of its consistent, razor-sharp edge and ergonomic handle. When you are assembling a heavy wool cardigan, you need a tool that glides through mattress stitch seams without catching on the yarn plies.
This tool features a fine, pointed tip that is ideal for navigating between dense stitches. The blade is exceptionally sharp, which means you spend less time sawing through yarn and more time correcting your alignment. It is particularly effective for thick, multi-ply yarns that might otherwise snag on duller blades.
The only downside is that the blade is quite aggressive. If you are working with delicate, single-ply mohair or fragile lace-weight alpaca, you must use a very light touch. It is the perfect reliable workhorse for 90% of your assembly projects.
Dritz Deluxe Seam Ripper: Best Value Option

If you are just starting your knitting journey and don’t want to invest heavily in specialized notions, the Dritz Deluxe is a fantastic entry point. It is widely available and performs reliably across a variety of wool blends and synthetic fibers.
The design is simple and functional, featuring a protective ball tip on the end to prevent you from accidentally slicing into your fabric. This is a crucial feature for beginners who haven’t yet developed the "knitter’s touch" for feeling exactly where the seam ends and the fabric begins.
However, the blade may dull faster than premium options if you use it on heavy-duty cotton or linen yarns. It is a great "backup" tool to keep in your project bag for quick fixes on the go. You get exactly what you pay for: a dependable, no-frills tool.
Gingher Seam Ripper: Best for Precision Work

Gingher is renowned for its high-quality steel, and their seam ripper is no exception. This tool is for the knitter who demands surgical precision when undoing a seam or correcting a complex colorwork mistake.
The blade is thinner and more refined than most standard rippers, allowing it to slide into extremely tight spaces. If you are working with high-twist merino or silk blends where every stitch counts, this tool provides the control you need to isolate a single loop without disturbing the surrounding structure.
Because it is so sharp, it requires a steady hand and a bit of experience. It is perhaps overkill for bulky acrylic sweaters, but it is an absolute dream for fine-gauge knitting and intricate garment finishing. Invest in this if you value longevity and blade sharpness.
Singer Ergonomic Ripper: Best for Hand Comfort

Knitting for hours can lead to hand fatigue, and the last thing you want is a tool that exacerbates that strain. The Singer Ergonomic Ripper features a thick, molded handle that is much easier to grip if you have arthritis or simply prefer a substantial tool in your hand.
The geometry of the handle encourages a natural grip, reducing the tension in your thumb and forefinger. This is particularly helpful when you are deconstructing a long seam on a large project like a coat or a heavy blanket.
While the handle is the star, the blade itself is more than capable for most standard yarn weights. It isn’t as precise as the Gingher, but for general assembly corrections, the comfort factor makes it a top-tier choice for long-term use.
Havel’s Seam Ripper: Best for Delicate Yarns
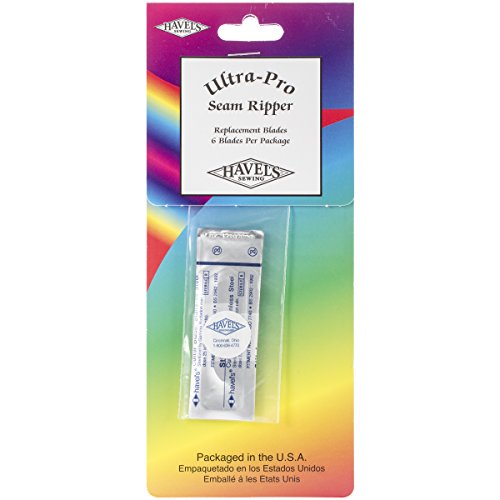
Havel’s is a brand that understands the importance of a clean cut. Their seam ripper is incredibly sharp and features a unique blade shape that slices through yarn like butter, minimizing the friction that often causes delicate fibers to pill or break.
When you are working with luxury fibers like cashmere or hand-dyed silk, you cannot afford to have your tool "chew" the yarn. Havel’s allows for a clean, swift cut that leaves your yarn ends intact, which is vital if you intend to reuse the yarn after undoing a seam.
The trade-off is that this blade is extremely sharp. You must be careful not to let it slip, as it will cut through your foundation fabric as easily as it cuts your seaming yarn. Use this tool with patience and deliberate movements.
Fiskars Quick-Clip: Best for Fast Corrections

The Fiskars Quick-Clip is not a traditional seam ripper, but rather a specialized snip designed for speed. When you are in the middle of a knitting marathon and realize a seam is twisted, you don’t always want to fiddle with a long-handled ripper.
These clips are perfect for snipping individual stitches quickly and safely. Because they function like scissors, you have more control over exactly where the cut happens compared to a blade that you push through a seam.
They are an excellent addition to your notions kit for "on-the-fly" adjustments. Just keep in mind that they are not designed for long, repetitive seam removal, but rather for targeted, quick-action corrections.
Why Sharp Tools Prevent Damage to Your Stitches
A dull seam ripper is the most dangerous tool in a knitter’s kit. When a blade is blunt, you are forced to use more pressure to cut through the yarn, which increases the likelihood of the tool slipping and slicing into your actual knitting.
Sharp tools require minimal force, allowing you to let the edge do the work. This is especially important for yarns with low twist or high "halo," like mohair or angora, which can easily tangle and mat if a dull blade drags through them.
Always keep your seam ripper clean and free of lint. A sharp, clean blade ensures that you are only cutting the specific thread you intend to remove, preserving the integrity of your hard-won stitches.
How to Safely Remove Seams Without Snagging
The secret to removing a seam is to work from the "wrong" side of the fabric whenever possible. By identifying the seaming yarn—usually a different tension or a slightly different texture than the main yarn—you can isolate it from the loops of your garment.
- Identify the tail: Always start at the end of the seam where you can see the original knot or tail.
- Work in small sections: Do not try to rip a long seam in one go; cut every few inches to release tension.
- Use the point, not the belly: Use the tip of the ripper to lift the thread before cutting to ensure you aren’t catching the underlying fabric.
If you are working with a dark yarn, use a bright light or a magnifying lamp. It is far better to take an extra five minutes to see what you are doing than to accidentally snip a hole in your sweater.
Essential Tips for Correcting Assembly Errors
When you realize a seam is wrong, take a deep breath and walk away for a moment. Ripping out a seam while frustrated is the fastest way to make a second, worse mistake.
Before you start, check your tension. If the seam is too tight, you may need to use a needle to loosen the stitches before you can even get the ripper blade underneath them. Once the seam is removed, gently steam or block the area to help the yarn "reset" its memory before you attempt to seam it again.
Finally, never reuse yarn that has been severely damaged or frayed by the ripping process. If the yarn looks thin or broken, discard that section rather than risking a weak seam in your finished garment.
Frequently Asked Questions About Seam Rippers
Can I use a seam ripper on lace-weight yarn? Yes, but use a very sharp, fine-tipped model like the Gingher or Havel’s. Always work under a bright light to ensure you are only cutting the seaming thread.
What should I do if I accidentally cut the knitting? Don’t panic! Use a crochet hook to pick up the dropped stitches and secure them with a bit of matching yarn. If the cut is significant, you may need to perform a small "duplicate stitch" repair.
How often should I replace my seam ripper? If you notice you have to "saw" at the yarn rather than making a clean cut, the blade is dull. For a dedicated knitter, replacing your primary ripper every 1-2 years is a good rule of thumb.
Correcting assembly mistakes is a rite of passage for every knitter, and having the right seam ripper ensures that these moments are merely minor detours rather than project-ending disasters. By choosing a tool that matches your specific fiber needs and comfort preferences, you gain the confidence to assemble your garments with precision. Remember, your tools are there to serve your creativity, so choose the ones that make your process smoother and more enjoyable. Happy knitting, and may your seams always align perfectly on the first try.