6 Best Lace Blocking Kits for Beginners to Try
Master lace blocking with our top 6 beginner-friendly kits. Learn how these essential tools ensure professional, symmetrical results for every delicate project.
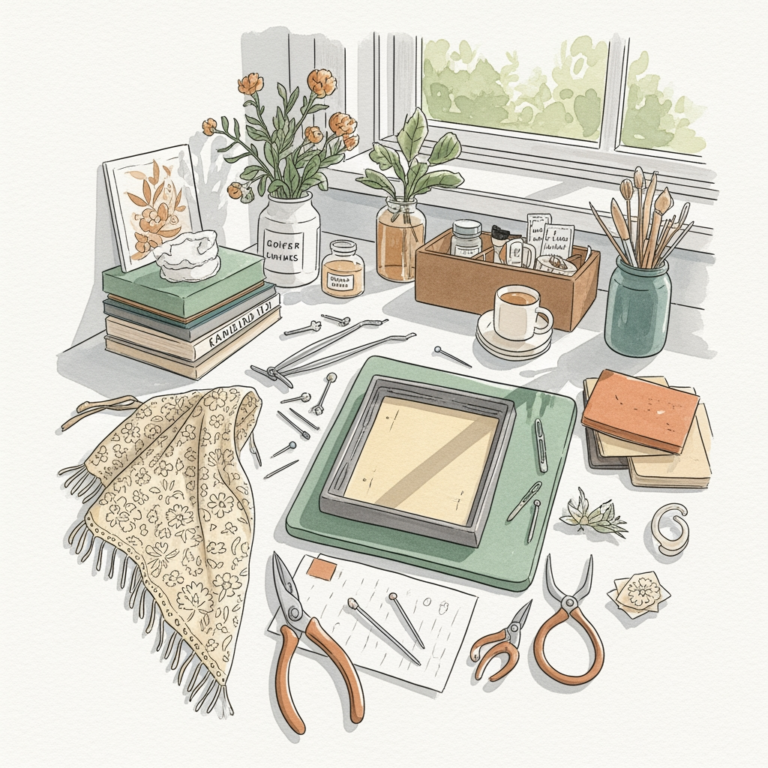
You’ve finally finished that intricate lace shawl, but fresh off the needles, it looks like a crumpled, tangled mess. Blocking is the magic step that transforms your hard work from a shapeless bundle into a professional, airy masterpiece. With the right tools, this final stage becomes a meditative ritual rather than a chore. Here are the best kits to ensure your lace points are sharp and your edges are perfectly straight.
Knitter’s Pride Lace Blocking Mats and Pins Set

This set is the gold standard for many knitters because it offers a comprehensive, all-in-one solution. The mats are thick enough to hold T-pins securely without them popping out, which is vital when you are under tension.
The inclusion of both T-pins and stainless steel lace pins is a major advantage. If you are blocking a delicate mohair-silk blend, the fine lace pins will glide through the stitches without snagging the fibers, unlike thicker pins that can distort your gauge.
The trade-off here is the footprint. These mats are substantial, so ensure you have a dedicated space, like a guest bed or a clean floor area, where your project can remain undisturbed for 24 hours.
Clover Blocking Mats: Best for Small Projects
Clover mats are renowned for their high-density foam, which feels firmer and more durable than cheaper alternatives. If you mostly knit socks or small cowls, these are perfect because they don’t take up your entire living room.
The interlocking edges are precise, meaning you won’t have to fight with gaps that catch your yarn. When you’re working with delicate lace, even a small snag on a mat seam can pull a stitch, so this seamless fit is a genuine quality-of-life feature.
Keep in mind that these are smaller than industry-standard sets. If you plan on graduating to full-sized shawls, you will eventually need to purchase additional packs to cover the necessary surface area.
Lacis Blocking Board with Grid for Precision

If you struggle with symmetry—especially when trying to get those lace points perfectly mirrored—the grid on this board is your best friend. It takes the guesswork out of measuring, allowing you to count squares rather than fumbling with a tape measure.
This board is particularly useful for those who prefer working on a tabletop. It provides a stable, elevated surface that saves your back from hunching over the floor for an hour while you pin out your lace.
The downside is the lack of flexibility. Unlike modular foam mats, this board is a fixed size, which limits the scale of the projects you can block on it.
KnitIQ Blocking Mats with Grid and T-Pins

KnitIQ has become a favorite because they clearly understand the frustration of uneven blocking. The printed grid isn’t just a gimmick; it’s a genuine guide that helps you maintain consistent tension across the entire width of your lace.
These mats are heat-resistant, which is a major plus if you use steam blocking to set your stitches. If you are working with animal fibers like wool or alpaca, steam can help "bloom" the yarn, making the lace look more cohesive and professional.
Bottom line: The grid system is excellent for beginners. It builds the muscle memory needed to understand how much tension is "just right" before your lace becomes overstretched.
Boye Blocking Board: Durable and Affordable
Boye offers a no-frills, reliable option for the knitter on a budget. It is a sturdy board that does exactly what it claims to do without unnecessary bells and whistles.
It is an ideal choice if you are just starting your lace journey and aren’t ready to invest in a premium, high-end system. The construction is solid enough to handle the pressure of blocking, and it folds down nicely for storage in a project bag or closet.
Don’t expect the same surface quality as higher-end mats. Over time, the material may show pin holes more clearly, but for the price, it is an unbeatable entry point.
Darice Foam Blocking Mats for Beginners
These are essentially the "utility" option of the blocking world. They are lightweight, easy to store, and get the job done for basic blocking needs where precision measuring isn’t the primary goal.
They are great for blocking hats or small accessories where you aren’t fighting against massive amounts of fabric tension. If you are a beginner who is nervous about the process, starting with something simple and inexpensive removes the pressure of "doing it perfectly."
Be aware that they are thinner than specialized knitting mats. You may find that your pins poke through the bottom, so be careful if you are blocking on a delicate wooden table.
Why Blocking Is Essential for Your Lace Knits
Blocking is not just about shaping; it is about finishing your fabric. When you knit lace, the stitches are often tight and uneven; blocking relaxes the fibers and opens up the yarn overs to reveal the intended pattern.
Without blocking, your lace will look like a knotted tangle of yarn. By adding moisture and tension, you allow the fibers to settle into their final position, which is the only way to see the true beauty of your stitch work.
Think of blocking as the final "press" in sewing. Just as a tailor presses seams to give a garment structure, a knitter blocks lace to give the fabric its drape and definition.
Essential Tools for Successful Lace Blocking
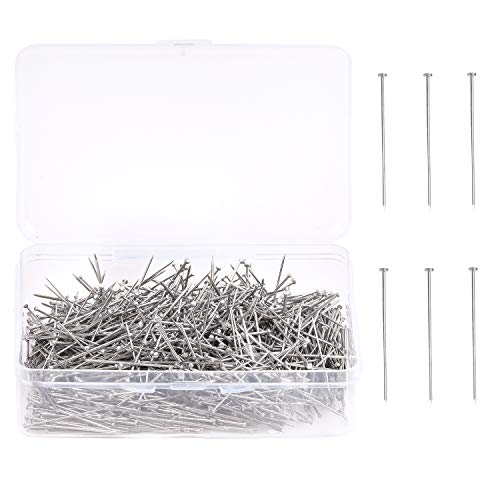
Beyond the mats, you need the right hardware to hold your work in place. T-pins are the standard, but they can sometimes leave larger holes in very fine lace.
Consider investing in blocking wires, which are long, flexible stainless steel rods. You thread these through the edges of your lace, allowing you to pin the entire straight edge at once rather than pinning every single stitch.
- T-pins: Best for curved edges and small points.
- Blocking wires: Essential for long, straight lace borders.
- Rust-proof pins: Always check the label to avoid permanent rust stains on your delicate light-colored yarns.
How to Properly Pin Out Your Lace Garments
Start by soaking your project in lukewarm water with a wool wash. Gently squeeze out the excess water—never wring it, as this can stretch or felt the fibers—and roll it in a thick towel to remove as much moisture as possible.
Lay your project on the mat and identify the center point. Pin the center first, then work your way outward toward the edges, ensuring the tension is even on both sides to prevent the piece from becoming lopsided.
The biggest mistake beginners make is over-stretching. You want to open the lace holes, not distort the stitch structure into an unrecognizable shape.
Tips for Drying Delicate Fibers After Blocking
Airflow is your best friend during the drying process. Do not use a hairdryer or place your project near a heater, as rapid drying can shock the fibers and cause them to lose their natural elasticity.
If you are blocking superwash wool, be aware that it tends to grow when wet. You may need to pin it slightly smaller than your desired size, as it will likely relax and expand as it dries.
Patience is the final ingredient. Let your project dry completely on the mats before removing the pins; if you unpin it while the fibers are still damp, the shape will collapse immediately.
Blocking is the bridge between a handmade craft and a professional-looking garment. Don’t be afraid to experiment with different tensions and techniques as you grow more comfortable with your tools. Once you see the transformation that happens when you unpin your first blocked project, you will never skip this step again. Happy knitting, and enjoy the beautiful results of your patience.