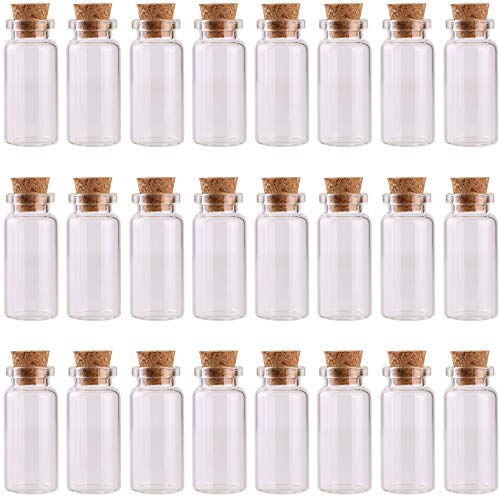
7 Best Sample Vials For Archiving Dye Outcomes
Preserve your dye results with precision. We review the 7 best sample vials for archiving, focusing on durability, UV protection, and airtight seal integrity.
Achieving the perfect colorway in your dye pot is only half the battle; keeping a permanent, accurate record of those hues is what separates a casual hobbyist from a master dyer. When you finally hit that elusive, perfect shade of indigo or madder root, you need a reliable way to store a physical swatch. This guide breaks down the best vessels to ensure your dye library remains vibrant and organized for years to come.
Glass Apothecary Vials: Best for Dye Archiving
Glass apothecary vials are the gold standard for long-term storage because glass is chemically inert. Unlike plastics, which can degrade or leach chemicals over decades, high-quality glass ensures your dye sample remains untainted by the container itself.
These vials provide a professional, archival-grade environment that protects your fiber samples from environmental contaminants. If you are building a legacy library of your hand-dyed yarns, the clarity of the glass allows for perfect color assessment without ever needing to open the seal.
The trade-off is fragility; these vials aren’t for tossing into your project bag. Treat them as a stationary reference library that stays on your studio shelf.
Plastic Centrifuge Tubes: Best for Field Work

If you find yourself foraging for natural dye materials like lichen, walnut hulls, or weld, centrifuge tubes are your best friend. They are engineered to be rugged, lightweight, and virtually indestructible under pressure.
Their conical bottoms are particularly useful for gathering small amounts of liquid dye extracts or tiny fiber scraps while out in the field. Because they feature a secure, often locking cap, you won’t have to worry about accidental spills ruining your gear.
While they are excellent for transport, they are not ideal for permanent, aesthetic displays. Use these for the messy, active phase of your work, then transfer your final results to glass for long-term archiving.
Borosilicate Test Tubes: Best for Heat Testing

When you are experimenting with mordant concentrations or pH modifiers, borosilicate glass is essential. This material is designed to withstand extreme thermal shock, meaning you can safely heat your dye samples directly in the vial.
These tubes allow you to observe how specific fibers react to heat-set dye processes in real-time. Because they are narrow and tall, they require very little dye liquor to submerge your fiber, making them perfect for testing expensive or rare natural dyes.
Always use a test tube rack to keep these upright, as their rounded bottoms make them impossible to stand on a flat surface. They are a scientific tool, not a storage vessel, so plan to move your samples once your testing is complete.
Screw-Top Plastic Vials: Best for Leak Control

When moving dye samples between your workshop and a local knitting guild meeting, you need a closure that won’t fail. Screw-top plastic vials provide a mechanical seal that is far superior to simple friction-fit caps.
These are the workhorses of a dyer’s kit because they offer a balance between durability and security. They are particularly effective if you are storing liquid samples alongside your fiber swatches, as the threads prevent evaporation and messy leaks.
Be wary of the plastic quality; over time, cheap plastic can become cloudy or brittle. Look for high-density polyethylene (HDPE) or polypropylene, which are more resistant to chemical breakdown from concentrated dye solutions.
Amber Glass Vials: Best for Light Protection

UV light is the silent enemy of natural dyes, capable of fading even the most carefully mordanted samples within months. Amber glass acts as a filter, blocking the specific wavelengths of light that cause pigment degradation.
If your studio receives a lot of natural sunlight, these are non-negotiable for your permanent library. They provide a dark, stable environment that keeps your colors as vivid as the day they came out of the pot.
The downside is that you cannot see the color without opening the vial. Keep a detailed index card tucked behind each vial so you know exactly what is inside without needing to expose the sample to light.
Snap-Cap Polypropylene Vials: Best for Speed

When you are deep in a dye session and need to catalog five different colorways in rapid succession, snap-cap vials are unmatched. You can open and close them with one hand, keeping your other hand clean and free from dye stains.
These are perfect for "quick-look" samples where you just need to keep a small snippet of yarn for color matching later. They are inexpensive, meaning you can stock up on hundreds of them without breaking your yarn budget.
However, they do not provide an airtight seal. These are best for dry fiber samples; do not use them for liquid dye extracts or wet samples, as they will inevitably dry out or spill.
Cork-Stopper Glass Vials: Best for Aesthetics
There is a certain charm to a row of glass vials sealed with natural cork. While they aren’t the most airtight option, they offer a tactile, old-world aesthetic that looks beautiful on a studio wall.
These are best for displaying your "greatest hits"—the colors you are most proud of and want to show off to fellow knitters. The slight porosity of the cork allows the fiber to "breathe," which is generally fine for dry, mordanted wool samples.
Avoid using these in humid environments, as cork can harbor mold if the air is consistently damp. For long-term preservation of delicate fibers like silk or alpaca, you may want to seal the cork with a bit of wax.
How to Label Dye Samples for Long-Term Storage
A sample is useless if you can’t remember the recipe, the mordant used, or the fiber content. Your label should be small enough to fit the vial but detailed enough to be a functional reference.
- Date: When the dye bath was prepared.
- Fiber Content: (e.g., 100% Superwash Merino, 75/25 Wool/Nylon).
- Mordant/Modifier: Include percentages or ratios used.
- Dye Material: The specific plant, extract, or synthetic powder.
Use archival-quality, acid-free paper for your labels. If you use standard tape, it will eventually yellow and peel off; instead, use a small piece of painter’s tape or a hanging tag tied to the neck of the vial.
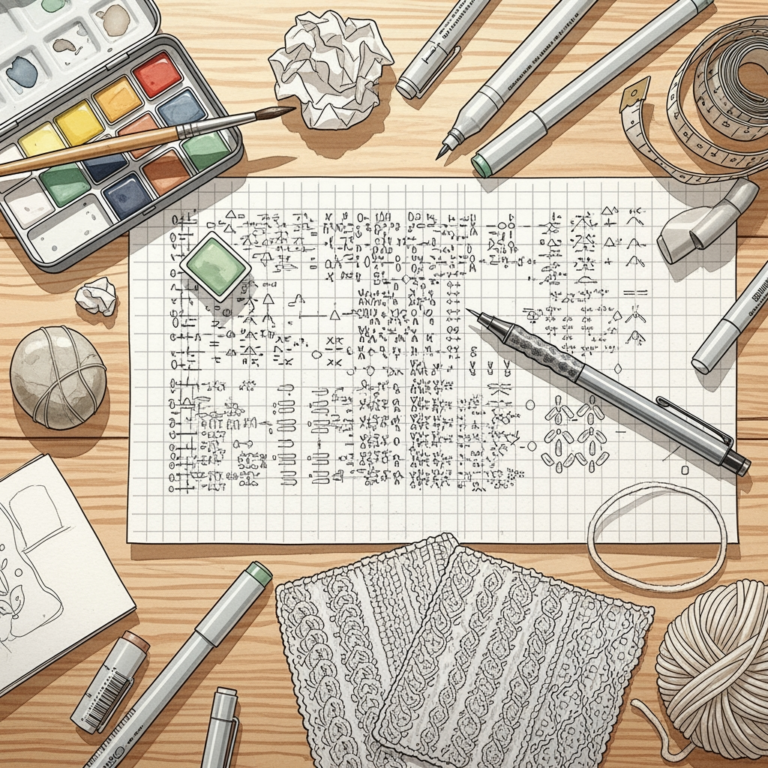
Essential Tools for Measuring Precise Dye Ratios
To replicate a color, you must be able to measure your dye materials with scientific accuracy. A digital gram scale that measures to at least 0.01g is mandatory for any serious dyer.
You will also need:
- Graduated Pipettes: For measuring liquid modifiers or pH-adjusting agents.
- Stainless Steel Measuring Spoons: Avoid plastic, as it can stain and hold onto previous dye residues.
- Small Beakers: For mixing your stock solutions before adding them to the main pot.
Consistency is the secret to a professional-looking stash. If you aren’t measuring, you aren’t dyeing; you’re just guessing, and your library will suffer for it.
Tips for Organizing Your Fiber Dyeing Library
The most effective way to organize your library is by color family, rather than by dye material. This allows you to quickly compare shades when you are planning a stranded colorwork project or looking for a complementary hue.
Create a master logbook that corresponds to the numbering on your vials. This keeps your physical display clean and uncluttered while ensuring you have a deep repository of technical data at your fingertips.
Finally, review your library once a year. Some natural dyes will shift over time regardless of how well you store them; noting these changes in your logbook is a valuable part of your growth as a dyer.
Building a dye library is a long-term investment in your craft that pays off every time you sit down to plan a new project. By choosing the right vials and keeping meticulous records, you transform your workspace into a professional-grade design studio. Your future self will thank you when you can perfectly recreate that one-of-a-kind colorway for a matching pair of mittens. Happy dyeing, and may your colors always stay true.