
6 Best Glass Beakers For Mixing Dye Solutions Tested
We tested six glass beakers for mixing dye solutions. Discover our top picks for durability, precise measurement, and chemical resistance in this guide.
When you’re ready to graduate from store-bought yarn to custom-dyed skeins, your choice of mixing vessel becomes as critical as your choice of needles. Dyeing requires the same precision as calculating your gauge for a complex colorwork sweater. A reliable glass beaker ensures your color formulas remain consistent across every batch. Investing in the right tools now saves you from the heartbreak of uneven, unrepeatable colors later.
Pyrex Borosilicate Glass Beaker: Best Overall Pick

If you’ve spent any time in a professional studio, you’ve seen the Pyrex name. It is the gold standard for a reason, offering the thermal shock resistance needed when you’re moving from a cold water soak to a heated dye bath.
For a knitter working with expensive hand-painted yarns, consistency is everything. You cannot afford to have a beaker crack when you’re mid-process with a delicate silk-mohair blend. This glass is thick, stable, and handles the temperature fluctuations of a stovetop dye pot without complaint.
The trade-off here is the price point, which is higher than generic alternatives. However, when you consider the cost of the fiber you are dyeing, the durability of professional-grade glass is a smart insurance policy. Stick with Pyrex if you want a tool that will last for decades of projects.
Karter Scientific Graduated Beaker: Best for Value

We all know the feeling of wanting to try a new technique—like immersion dyeing—without breaking the bank on equipment. Karter Scientific offers a reliable middle ground that doesn’t sacrifice the safety features necessary for chemical handling.
These beakers are excellent for the knitter who is just beginning to experiment with acid dyes. They provide clear, easy-to-read graduations that help you measure your stock solutions with accuracy. You don’t need a professional lab setup to achieve professional-looking results on your wool.
While the glass may not be quite as thick as the premium options, it is perfectly adequate for home dyeing. Just be sure to handle them with care, as they are slightly more prone to chipping if they clatter against your stainless steel pots. It is a fantastic entry-level choice for your first few colorway experiments.
United Scientific Glass Beaker: Best for Precision
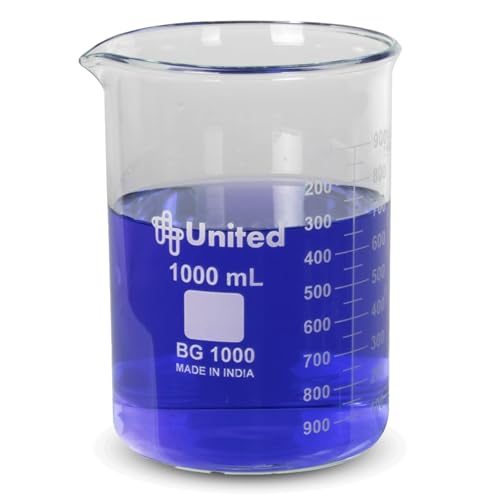
When you are trying to replicate a specific shade of indigo or a complex variegated palette, precision is your best friend. United Scientific provides some of the most accurate, easy-to-read markings on the market.
For those of us who keep detailed dye journals, this beaker removes the guesswork. If your formula calls for exactly 45ml of a concentrated dye solution, you can trust that this beaker will help you hit that mark every single time. It takes the frustration out of color matching.
The glass quality is top-tier, featuring a uniform wall thickness that ensures heat distributes evenly during the mixing process. It is a slightly more expensive investment, but it pays off when you’re trying to match a second skein to finish a sweater. If your goal is professional-grade consistency, this is the tool for you.
StonyLab Heavy Duty Beaker: Best for Durability

If you are a bit clumsy in the studio—or if you share your space with pets or kids—the StonyLab Heavy Duty line is a lifesaver. These beakers are designed with a reinforced rim and extra-thick walls to withstand the rigors of a busy craft room.
I often tell my students that the best tool is the one that survives the work environment. You’ll find that these beakers handle the accidental "clink" against a sink faucet much better than standard thin-walled glass. They provide a sense of security that allows you to focus on the color rather than the equipment.
Because they are so sturdy, they are slightly heavier than other options, which can be a minor adjustment when you’re pouring. However, the stability is a major benefit when you’re working with concentrated powders that you don’t want to spill. It’s a workhorse piece of equipment that won’t let you down.
Eisco Labs Low Form Beaker: Best for Mixing Dyes

The "low form" shape is a secret weapon for dyers who work with smaller batches of yarn. Because the beaker is wider and shorter, it is much easier to stir your dye solutions without splashing.
When you are mixing concentrated pigments, the last thing you want is a tall, narrow beaker that makes it difficult to reach the bottom with a stirring rod. The low form design offers a larger surface area, making it simple to ensure all your powder is fully dissolved. It’s the ergonomic choice for long dyeing sessions.
These beakers are also very stable on the counter, reducing the risk of tipping over when you’re measuring out multiple colors. If you prefer working in smaller, controlled batches—perhaps for a pair of socks—this is the most efficient shape to keep in your kit.
Bomex Glass Lab Beaker: Best Budget-Friendly Set

Sometimes you need a variety of sizes for different tasks, like measuring your leveling agent, your citric acid, and your dye concentrate all at once. Bomex sets provide that versatility at a price that leaves more room in your budget for high-quality yarn.
Having a set of different sizes is incredibly useful for a knitter who wants to experiment with different yarn weights. You might need a small beaker for a tiny test sample and a larger one for a full sweater’s worth of dye. This set covers all your bases without requiring multiple separate purchases.
The quality is consistent and perfectly safe for home use, provided you follow standard laboratory practices. While they might not be as heavy-duty as the premium brands, they are more than sufficient for the hobbyist. It’s the best way to stock your studio quickly and affordably.
Essential Properties of Dye-Safe Glass Containers
When selecting your glassware, you must prioritize materials that won’t react with your dyes or chemicals. Borosilicate glass is the only choice here, as it is chemically inert and won’t leach impurities into your dye bath.
- Thermal Shock Resistance: Essential for moving between temperature zones.
- Chemical Inertness: Ensures your dyes don’t change color due to glass reactions.
- Clear Graduations: Non-negotiable for repeatable color formulas.
- Stability: A wide base prevents accidental spills of concentrated dye.
Avoid using standard kitchen glassware for your dyeing projects. Laboratory glass is specifically engineered to handle the concentrated acids and heat that can cause common household glass to shatter or cloud over time.
How to Properly Calibrate Your Dyeing Equipment
Calibration is the difference between a "happy accident" and a repeatable colorway. Even the best beaker is only as good as your technique, so start by ensuring your beaker is perfectly level before taking a reading.
Always read the meniscus—the curve of the liquid—at eye level. If you look down at the beaker, you will consistently mismeasure your solutions, leading to subtle but noticeable shifts in color. It’s the same principle as checking your needle gauge; if you aren’t consistent, your final project won’t be either.
Keep a dedicated pipette or syringe for measuring your liquids, and double-check your measurements against your notes. Consistency in the mixing stage is the only way to ensure that your yarn will match the swatch you spent hours knitting.
Safety Tips for Handling Concentrated Dye Powders
Dye powders are incredibly fine and can easily become airborne, which is a major respiratory risk. Always work in a well-ventilated area and use a dust mask when measuring out your dry pigments.
Think of it like handling raw wool fiber; you don’t want those particles floating around your workspace. Wear gloves to protect your skin from staining and to prevent cross-contamination between your dye pots. Treat these powders with the same respect you would give any professional chemical.
Keep your workspace clean and wipe down surfaces immediately after mixing. If you spill a concentrated powder, use a damp cloth to pick it up rather than sweeping it, which just kicks the dust back into the air. Safety is the foundation of a long and enjoyable dyeing practice.
Cleaning and Maintaining Your Glass Mixing Tools
Proper maintenance extends the life of your beakers and prevents color "bleeding" from one batch to the next. Rinse your beakers with warm water immediately after use to prevent dye residue from drying and bonding to the glass.
If you notice stubborn staining, a soak in a mild vinegar solution usually does the trick. Never use harsh abrasive scrubbers, as they can create microscopic scratches in the glass where dye can hide. A soft bottle brush is the best tool for reaching those bottom corners.
Store your beakers in a safe place where they won’t knock against each other. If you see even a tiny crack or chip, retire that beaker immediately; the stress of heat will eventually cause it to fail, and you don’t want a hot dye bath spilling across your studio floor.
Building your own colorways is one of the most rewarding extensions of the knitting craft. By choosing the right glass beakers, you are setting yourself up for success and ensuring that your beautiful hand-dyed yarns remain consistent. Treat your tools with care, keep your formulas precise, and enjoy the magical transformation of your fiber. Happy dyeing, and may your colors always turn out exactly as you envisioned.
