6 Best Weaving Tools For Edge Control Worth Owning
Master edge control with these 6 essential weaving tools. Discover the top picks for professional results, precision styling, and long-lasting hair health.
Achieving perfectly straight selvedges is the hallmark of a master weaver, separating amateur work from professional-grade textiles. While many beginners focus solely on the pattern, the true quality of a piece lies in how the edges behave under tension. Investing in the right tools can turn a frustrating, wavy edge into a crisp, uniform line. Here are the six essential tools that will elevate your weaving precision and help you achieve that elusive, clean finish.
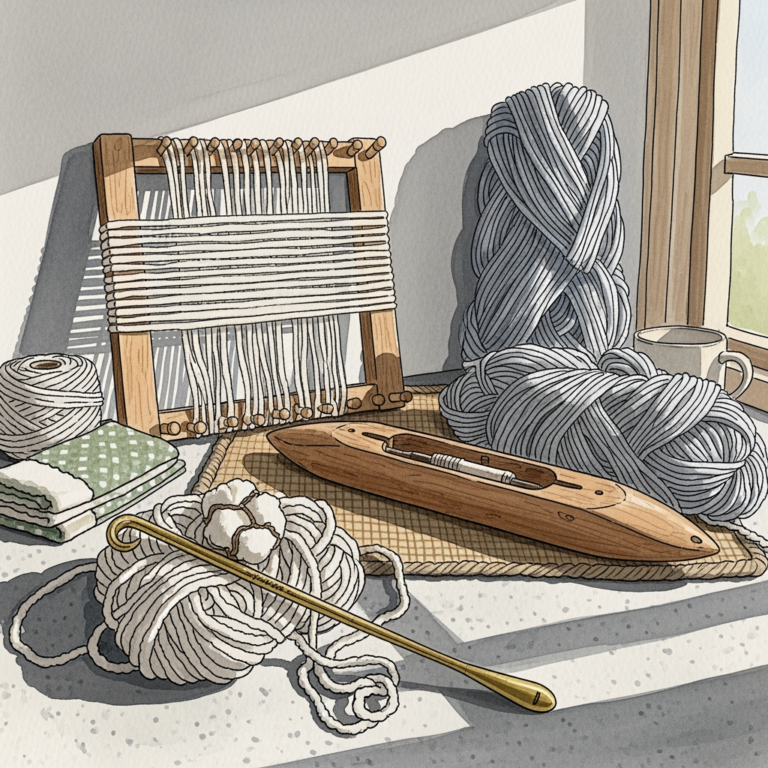
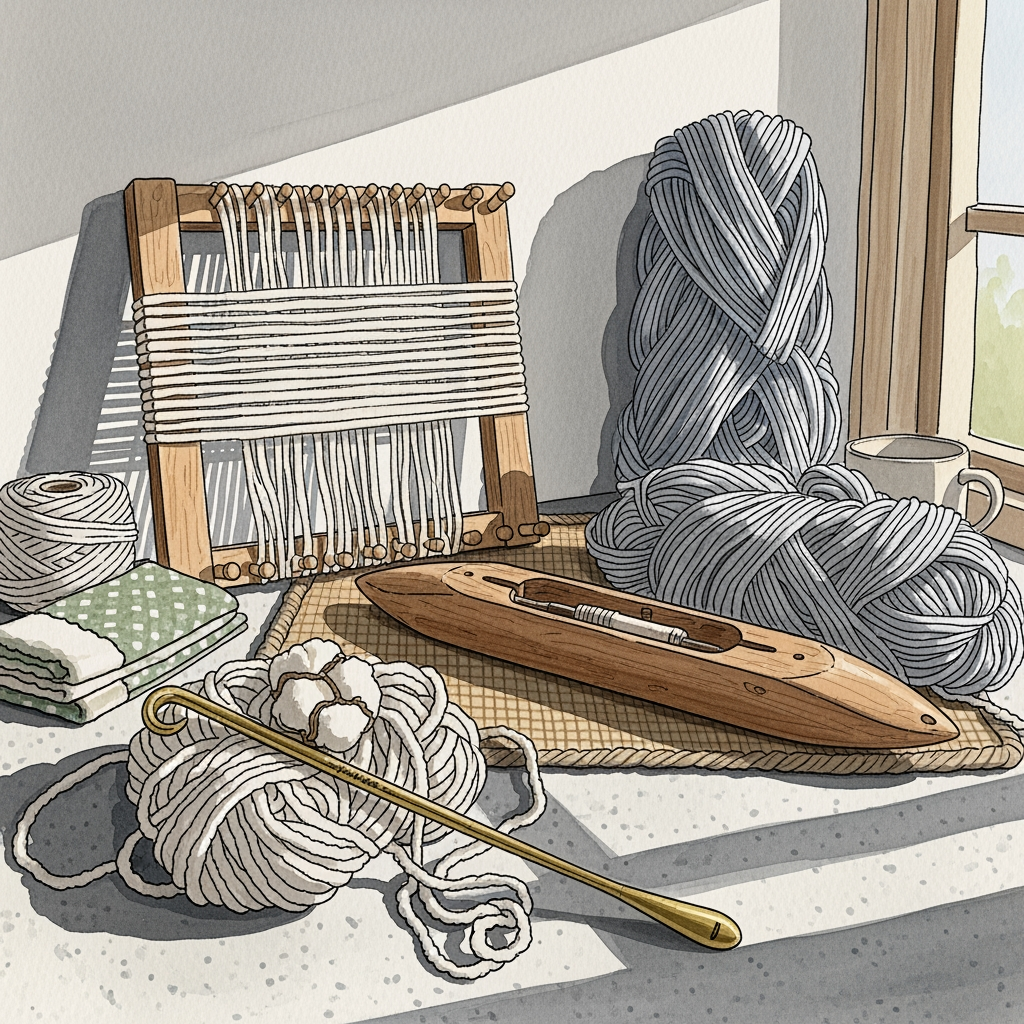
Schacht Spindle Company 6-Inch Flat Weaving Shuttle

The 6-inch flat shuttle is a workhorse for small-scale projects or narrow bands. Its low profile allows it to glide through the shed with minimal friction, which is vital when working with delicate or sticky fibers like mohair or high-twist wool.
Because it is flat, it doesn’t occupy much vertical space in the shed. This is a game-changer if your loom has a shallow opening, as it prevents the shuttle from catching on the warp threads and causing accidental tension spikes.
The trade-off is that it holds less yarn than a bulky boat shuttle. If you are working on a long warp, you will find yourself refilling it frequently, which can disrupt your rhythm. However, for intricate pick-up work or small tapestry details, this lack of bulk is exactly what you need for accuracy.
Ashford 10-Inch Boat Shuttle for Precision Edges

Boat shuttles are designed for speed and rhythm, and the Ashford 10-inch model is a favorite for its ergonomic weight. The rounded bottom allows it to "rock" through the shed, making it much faster to pass than a flat stick shuttle.
When you are weaving a wider piece, the weight of a boat shuttle helps keep the warp threads held down firmly. This consistent downward pressure ensures that your weft isn’t pulling the edge threads inward, which is the most common cause of "hourglass" shapes in weaving.
Be aware that these require bobbins, which adds a step to your prep work. If you are using a slippery yarn like silk, ensure your bobbin is wound evenly, or the shuttle will jerk and cause uneven tension at the selvedge.
Kromski 12-Inch Stick Shuttle for Tension Control
Stick shuttles are deceptively simple, but they offer the most tactile feedback of any tool. Because you hold the shuttle directly, you can feel exactly how much tension you are applying to the weft yarn as you pull it through.
I recommend this for beginners who are still learning to "feel" their tension. If you pull too hard, you’ll see the edge draw in immediately; if you pull too little, the edge looks loose and messy. The Kromski model is smooth and splinter-free, which is essential for protecting fine fibers.
The downside is that you have to manually guide the yarn every time. It isn’t as fast as a boat shuttle, but for learning the mechanics of a perfect selvedge, there is no better teacher.
Leclerc 8-Inch Steel Weaving Needle for Finishing

Sometimes, the best way to control an edge isn’t during the weaving, but during the finishing. A steel weaving needle is indispensable for pulling in loose ends or correcting a rogue selvedge thread that decided to loop out.
Unlike plastic needles, which can be too thick and distort your fabric, these steel needles are slim and precise. They are perfect for "weaving in" your tails along the selvedge, ensuring the edge remains flat and secure without adding unnecessary bulk.
If you are working with high-twist yarns or metallic threads, the steel finish won’t snag or fray the fiber. Keep a few sizes on hand to match the weight of your warp; using a needle that is too large will leave visible holes in your finished cloth.
Glimakra Wooden Edge Temple for Uniform Selvedges
A temple—or stretcher—is a tool that keeps your fabric at the correct width while you weave. If you find your edges are constantly pulling inward despite your best efforts, the temple is your best friend.
This tool physically holds the edges out to the width of your reed. It acts as a safety net, preventing you from accidentally drawing the weft too tight as you progress through the piece. It is especially useful when weaving linen, which has no elasticity and will show every minor tension error.
The main trade-off is that you must move the temple every few inches. It can feel like a chore, but the result is a perfectly parallel edge that looks like it came off a commercial loom.
Harrisville Designs Plastic Shuttle for Beginners
Plastic shuttles are often overlooked by seasoned weavers, but they are incredibly durable and easy to clean. If you are working with sticky, dyed yarns that might bleed or leave residue, a plastic shuttle is much easier to maintain than wood.
These are lightweight and very forgiving for students. If you drop them—and you will—they won’t dent or crack like a wooden shuttle might. They are the perfect "beater" shuttle for workshop settings or high-traffic weaving sessions.
They do lack the "soul" and grip of wood, however. If you are working with very slick synthetic yarns, the yarn may slide off the ends more easily. Use a rubber band on the ends if you find your yarn is slipping off too frequently.
How to Maintain Proper Tension for Clean Selvedges
Tension is the heartbeat of your textile. If your warp tension is too loose, your edges will look scalloped; if it is too tight, you risk breaking your warp threads or creating a fabric that feels like cardboard.
Always check your tension before you start weaving a new section. A quick tug on the warp threads should feel uniform across the entire width of the loom. If one side feels looser than the other, adjust your tensioning system until the resistance is equal.
Remember that different fibers react differently to tension. Wool has natural elasticity and will "forgive" minor inconsistencies, while cotton and linen are unforgiving. Adjust your expectations and your tension settings based on the fiber’s natural memory.
Why Edge Control Matters in Handwoven Textiles
Edge control is not just about aesthetics; it is about the structural integrity of your cloth. A loose or wavy selvedge is a weak point that can unravel or snag on clothing and furniture.
When your edges are uniform, your fabric will drape evenly. If one side is tighter than the other, the entire piece will bias or skew, causing it to hang crookedly. This is particularly noticeable in scarves and wraps, where drape is the primary goal.
Think of the selvedge as the frame of a painting. If the frame is distorted, the entire composition feels unbalanced to the eye. Mastering this skill elevates your work from "craft" to "heirloom."
Essential Techniques for Perfect Selvedge Edges
The most effective technique for a clean edge is the "angle" of your weft. Never lay your weft yarn straight across the shed; instead, lay it in at a 45-degree angle before beating it into place.
This extra slack provides the yarn with enough "breathing room" to travel over and under the warp threads without pulling them inward. It is the single most important habit you can develop to stop your edges from drawing in.
Another trick is to catch the selvedge thread slightly differently on the return pass. By looping the weft around the outermost warp thread, you create a "locked" edge that is much more stable than a simple pass-through.
Troubleshooting Common Weaving Edge Distortions
If your edges are pulling in, you are likely pulling the weft too tight. Stop, back up a few picks, and try laying in more yarn than you think you need. It should look a bit "bumpy" in the shed before you beat it.
If your edges are looping out, you are likely leaving too much slack. This often happens when the shuttle is passed with too much force, causing the yarn to bounce back. Slow down your shuttle pass and guide the yarn gently to the edge.
Finally, check your reed. If your warp is not centered, the tension will naturally pull toward the path of least resistance. Always center your warp to ensure the force of the beater is distributed evenly across the entire width.
Mastering your selvedges is a journey, not a destination, and it requires both the right tools and a patient hand. By incorporating these shuttles, needles, and temples into your workflow, you provide yourself the mechanical support needed to succeed. Remember that every weaver struggles with tension at some point, so focus on the process rather than perfection. With practice, you will find that your edges become as steady and reliable as your own heartbeat.